
Earlier in December I was sent a soap making kit through a promotion on the AO blog. It was originally for a competition, but the kits were posted with quite a short deadline so I had to send my apologies as I knew there was no way I’d be able to make the deadline of a few days the week I had 4 Christmas ‘dos’. (The soap making competition was however won by the lovely Laura of The Mrs Makes with some amazing sounding soaps.)
I did want to get round to making the soaps as I thought they’d be perfect prezzies and I managed to squeeze in a crafting session before it was time to hand out my Christmas gifts.

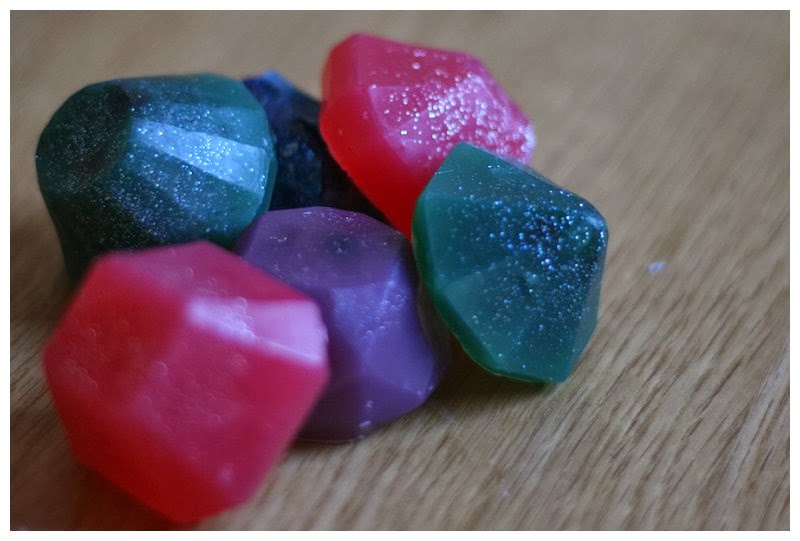
The kit that arrived contained a ‘Melt and Pour’ soap base, which is really as easy as it sounds. At the simplest end of soap making, you quite literally melt the blocks of soap and pour it into a mould for setting. But as it is such a basic set, there are loads of ways that you can enhance it. I decided as these would be gifts for Christmas I’d make them a bit sparkly and special and I knew exactly what to do. I set about raiding my cupboard for baking supplies – food colouring gel and edible glitter were required. As was the super cute ice cube tray that makes jewel shaped cubes. Whilst on the hunt I also found a little bottle of frangipani essence too. Making the soap was far easier than I imagined it might be. I started early one morning and had it all done ready to package before Jim woke from his hangover.

What I used;
- 1/2 Melt and Pour soap base kit
- Gel food colourings in all the colours you fancy
- Edible glitter
- Ice cube tray/mould.
- Essence for a fancy smell.
How to make your soap;
- Cut the soap base into little bits and roughly put them into your mould to gauge how much you’ll need to use. I was using 4 different colours of colouring so did it four times over.
- You can melt your soap in a microwave, but we don’t have one so I had to melt them on the hob. I used a trick I’ve used before for melting wax – I popped the soap base into jam jars and melted it in that. This way it was separate for the colouring stage and I could just throw the jars away after. My laziness knows no bounds sometimes!
- Add small amounts of the food colouring. I used the end of a wooden skewer to add the colouring bit by bit and mix the soap (again fully disposable). Once I was happy with the colour, I waited for all the soap to melt. Food gel is so much stronger than liquid colouring so I have learnt to be quite sparing with it.
- Now add your fragrance. Go slowly as you can’t take it out again – I added a few drops to each jar.
- Whilst waiting for the soap to fully melt I lined the ice cube tray with glitter so the outsides of the soap glimmered.
- Once all the soap was melted I carefully poured the soap into the based and popped it in the fridge to set.
I repeated this with the four different colours, melting the soaps whilst the previous lot was setting in the fridge. As they were quite small, it didn’t take long and they just popped right out of the moulds too.
I think for my next go I might make some actually skin nourishing ones like Laura’s, but for now we’re rocking the girlie smell and glitter.
Oooh, these are so pretty! I love your handmade gifts, they always look so good.
Thank you. I *may* have only photographed the ones that came out well though 😉
I love them! So pretty & super easy to make. Score! 🙂 x
I love a good quick craft project! Especially when they are simple too. x